
A dark ceiling stain or a persistent drip during a heavy rainstorm is one of the most frustrating experiences a property owner can face. Water intrusion is sneaky; by the time moisture becomes visible on an interior surface, it has often traveled a considerable distance through hidden pathways within the building envelope. Leaving a leak unaddressed leads to rotting framing timber, ruined insulation, compromised drywall, and hazardous mold growth that degrades indoor air quality.
Tracing the true origin of water entering a structure requires a systematic approach. Water rarely travels in a straight line, as gravity, capillary action, and surface tension cause it to flow along rafters, ceiling joists, electrical conduits, and underlayment before finally dripping down. Understanding how water moves through building materials, knowing where to look during an inspection, and executing correct repair strategies are essential skills for protecting structural integrity and avoiding costly interior repairs over time.
The Physics of Roof Leaks and Hidden Water Paths

To find the source of water entering a building, you must first understand how water behaves once it breaches the outer protective layer. When rain falls on a sloped surface, gravity pulls it downward. However, when water passes through a small puncture or damaged seam, it does not immediately drop straight into the room below. Instead, it follows the path of least resistance along the sloping underside of the roof decking or along structural support beams.
Capillary action also plays a major role in water movement. This phenomenon occurs when water is drawn into tiny gaps between overlapping materials, such as under shingle edges or between flashing joints, defying gravity to travel horizontally or even upward in high-wind conditions. Additionally, surface tension allows water to cling to the underside of plywood sheets, traveling feet away from the initial penetration before pooling and falling onto the ceiling below.
Fiberglass or cellulose insulation often acts like a massive sponge, absorbing dozens of gallons of water before saturation forces liquid to break through the sheetrock. Consequently, an interior water mark directly above a living room couch might correspond to a torn flashing joint twenty feet away near the roof ridge. Identifying where the water breaks through internally is only the first step; tracing that path backward to its exterior origin requires careful investigation.
Primary Exterior Vulnerabilities and Common Leak Sites
While a roof is designed to shed water efficiently, certain areas are inherently more prone to failure than others. Penetrations through the protective membrane or shingle layer represent the highest risk areas. Items such as plumbing vent stacks, exhaust fans, skylights, and chimneys interrupt the continuous drainage plane and rely heavily on specialized flashing and sealant systems to remain watertight.
-
Plumbing Vent Boots: Rubber neoprene collars on vent pipes degrade under sunlight over time, cracking and allowing water to run down the pipe directly into the attic.
-
Chimney Step Flashing: Metal flashing installed along the sides of chimneys can pull away from masonry joints as building foundations settle, breaking the mortar seal.
-
Roof Valleys: Valleys carry the highest volume of water during storms; any accumulation of leaves or debris can slow drainage, allowing standing water to back up under overlapping courses.
-
Wall Intersection Flashing: Where a sloped roof meets a vertical sidewall, counter-flashing must be properly stepped and tucked beneath house wrap to prevent wind-driven rain from entering.
-
Drip Edges and Eaves: Missing or improperly installed metal drip edges allow rainwater to curl backward under the edge of shingles due to surface tension, rotting the fascia boards and rake edges.
Over time, seasonal weather cycles inflict constant physical stress on protective coatings and structural materials. Contracting and expanding under direct sun exposure causes small gaps to widen, while extreme cold can crack aged rubber components. When these secondary barriers fail, water easily finds its way into the vulnerable wooden substrate below. Homeowners facing complex leaks often turn to residential roofers to navigate these multi-layered drainage systems safely and restore full protection. When water damage extends past the roof decking into wall cavities or finished spaces, coordinating with a restoration company becomes necessary to dry out the structure and prevent mold spore proliferation.
Interior Diagnostics and Attic Tracking Techniques
The most effective initial phase of leak tracing happens inside the structure, specifically within the attic space or crawl space directly beneath the roof deck. Conducting an interior inspection with roofing companies while it is raining, or immediately after a storm, provides the clearest clues regarding active water pathways. Safety is paramount during this process: always walk on solid structural joists rather than stepping directly on ceiling drywall, which can easily collapse under weight.
To track down a leak from inside the attic, equip yourself with a bright flashlight, a measuring tape, and a moisture meter. Begin by locating the ceiling stain or damp drywall inside the living space. Measure its distance from two interior walls, then transfer those measurements to the attic interior to locate the corresponding area above.
-
Inspect Framing Timbers: Look for wet streaks, dark water stains, or discoloration along the sides and undersides of rafters and trusses.
-
Examine Decking Fasteners: Check exposed roof nails protruding through the plywood. If nails appear rusty, white with mineral crust, or dripping with liquid, water is traveling along the upper surface of the underlayment.
-
Check Insulation Conditions: Shift back insulation batts to inspect the upper side of the ceiling drywall. Damp, compressed, or discolored insulation indicates a leak overhead.
-
Look for Mold or Fungi Growth: Clustered dark spots or white powdery mold on timber framing indicate chronic, repeating moisture intrusion rather than a single storm event.
Remember that cold winter air can also create condensation that mimics a structural roof leak. Poor attic ventilation allows warm, moist air from living spaces to rise into the unconditioned attic. When this humid air contacts cold roof decking during winter months, moisture condenses into frost or liquid droplets on exposed nail heads, eventually dripping onto the ceiling below and giving the false appearance of an exterior leak.
Exterior Roof Surface Inspection Strategies

Once you have gathered interior measurements and identified probable entry zones, the next phase involves examining the exterior roof surface. Performing an exterior roof check requires strict safety precautions. Wear non-slip, rubber-soled footwear, use a properly secured extension ladder, and utilize a safety harness anchored to a certified point whenever climbing onto sloped elevations.
Begin your exterior assessment by evaluating the general condition of the primary roofing material around the suspected area. On asphalt shingle systems, search for curled, cracked, or missing tabs, as well as areas where heavy granule loss has exposed the black fiberglass mat beneath. On metal or tile installations, check for shifted panels, broken fasteners, or cracked mortar caps along the ridge.
Look closely at all flashings surrounding chimneys, dormers, skylights, and vertical wall intersections. Metal flashing should lie flat against adjacent surfaces without gaps or buckling. Inspect the condition of sealants along step flashing and counter-flashing joints. Aged caulk often shrinks, cracks, or separates from brickwork, creating an open channel for water. On low-slope or flat roofing assemblies, check for standing water pools, split seams, punctures in the synthetic membrane, and blisters caused by trapped moisture expanding under intense heat.
Commercial properties with broad horizontal expanses require specialized oversight due to the complex drainage systems and heavy rooftop HVAC equipment involved. A dedicated commercial roofing company brings specialized equipment to test seam integrity, inspect scuppers, and repair large-scale synthetic membranes without damaging underlying insulation layers. Identifying small membrane punctures early prevents large volumes of water from migrating horizontally beneath the insulation boards.
Methodical Water Hose Isolation Testing
When visual inspections yield no obvious defects, conducting a controlled water test is the most reliable method for confirming a leak’s precise entry point. This procedure requires two people working together: one person stationed inside the attic or building interior with a flashlight and moisture meter, while the second person operates a garden hose on the exterior surface.
Clear communication between both team members is essential, whether using two-way radios or cellular phones. The interior observer must be able to signal the hose operator the instant water appears or moisture readings rise inside the structure.
-
Start Low on the Roof Slope: Begin spraying water at the lowest point of the suspected area, such as directly above the eaves or right over a lower flashing joint. Never start at the top, as water running downward will obscure which specific section caused the leak.
-
Isolate Individual Features: Concentrate the water spray on one specific component at a time. For example, spray only the base of a plumbing vent pipe for at least five minutes before moving upward.
-
Maintain Low Pressure: Use a steady, low-pressure stream of water directed downward, mimicking natural rainfall. Avoid using high-pressure sprayers, which can force water upward under intact shingles and create artificial leaks that would not occur during normal storms.
-
Work Slowly Upward: Gradually move the hose higher along the roof plane, testing valleys, sidewall flashings, and skylights in five-to-ten-minute increments.
-
Allow Time for Migration: Pause for several minutes between moving to a new section to give water sufficient time to travel through underlying materials and reveal itself to the interior observer.
If water suddenly appears inside, immediately stop spraying and mark the exact position on the exterior surface. This isolation technique eliminates guesswork and ensures that repairs focus on the precise point of failure rather than applying unnecessary sealants over intact materials.
Weather-Related Damages: Hail, High Winds, and Storms
Severe weather events are major drivers of sudden, severe roof leaks. High winds, heavy hail, and falling tree limbs can compromise even well-maintained roofing systems in minutes. Understanding how different weather conditions damage specific materials helps in identifying hidden storm impacts during post-event inspections.
High winds create strong uplift forces along perimeter edges, roof ridges, and corners. Wind can lift shingle tabs upward, breaking the factory adhesive seal beneath them. Once this thermal seal is broken, wind forces water upward beneath the shingles during subsequent rainfall. In severe cases, wind peels back entire sections of material, exposing the underlying wooden deck directly to the elements.
Hail damage presents a different diagnostic challenge because it often remains undetected until long after the storm has passed. Large hailstones impact roof surfaces with immense force, fracturing internal fiberglass mats, dislodging protective granules, or cracking rigid tiles and slate shingles. On asphalt shingles, hail leaves round, dark indentations that feel soft to the touch, similar to a bruised apple. Over time, rain washes away loose granules at these impact sites, exposing the bare asphalt to solar UV rays, which accelerates material breakdown and leads to widespread leaking.
Property owners suspecting severe storm impact should arrange for a local hail damage inspection to document physical evidence accurately for insurance purposes. Specialized inspectors assess granule displacement, hail strike density per square, and structural framing impacts across all roof slopes. Multi-family housing complexes and managed communities face unique challenges during severe storms due to sprawling roof areas and shared attics; contacting specialized apartment complex roofing services ensures rapid multi-unit assessments, proper emergency tarping, and organized tenant protection when severe weather strikes.
Emergency Temporary Leak Mitigation Steps
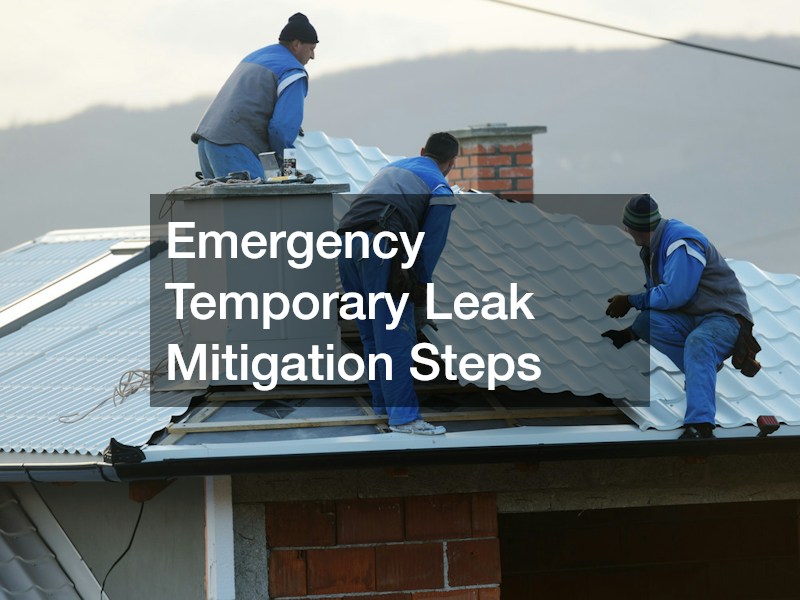
When water is actively leaking into a building, immediate action is required to minimize structural damage and protect interior furnishings. Emergency mitigation focuses on stopping water ingress temporarily until permanent structural repairs can be completed safely.
First, address active interior water accumulation. Place heavy-duty buckets or plastic containers beneath dripping points to collect incoming water. If water is pooling behind ceiling drywall and creating a bulging, saggy bubble in the paint, locate the center of the bulge and carefully puncture it with a screwdriver or utility knife. Draining trapped water through a single controlled hole prevents the entire wet drywall panel from collapsing unexpectedly under heavy weight.
Once interior water is contained, take safe temporary measures on the exterior if weather conditions permit. Installing a heavy-duty woven plastic tarp over the damaged roof section is the most effective temporary defense against ongoing rain.
-
Select Proper Tarp Dimensions: Use a tarp that extends at least four feet beyond the damaged area on all sides and stretches completely over the roof ridge to prevent water from running underneath the top edge.
-
Secure with Wooden Batten Strips: Fasten the edges of the tarp using two-by-four wooden boards or furring strips nailed through the tarp into the roof deck. Never simply weigh a tarp down with bricks or sandbags, as high winds can dislodge heavy objects and create severe safety hazards.
-
Apply Wet-Surface Mastic: For minor flashing gaps or pipe boot tears, apply temporary wet-grade roofing cement or neoprene sealant directly over the leak site using a trowel or caulking gun.
-
Clear Gutters and Drains: Remove accumulated leaves, twigs, and ice dams from drainage channels to ensure water flows off the roof edge freely instead of backing up under lower courses.
Executing Permanent Repairs for Common Leak Sources
After temporary measures are in place and the weather clears, focus turns to executing permanent, long-term repairs. A lasting repair requires replacing damaged materials rather than simply smearing roofing cement or caulk over an existing defect, as surface sealants quickly shrink, crack, and fail when exposed to thermal movement and weather cycles.
To repair damaged or missing asphalt shingles, carefully lift the overlapping tabs above the damaged shingle using a flat pry bar to expose the underlying nails. Pop out the nails cleanly, slide the damaged shingle out, and insert a fresh shingle of matching dimensions and rating. Fasten the new shingle with galvanized roofing nails placed slightly above the old nail holes, then apply a small dab of asphalt roof cement beneath the overlapping tabs to re-establish the wind-resistant thermal seal.
When addressing failing pipe boots, replacing the entire rubber and metal boot flashing assembly yields the most dependable results. Pry up the surrounding shingles on the sides and top of the old boot, remove the fasteners holding the base plate to the roof deck, and slide the old flashing up and off the vent pipe. Install the new boot assembly over the pipe, tucking the top flange underneath the overlapping shingles above it while leaving the lower flange sitting over the shingles below to maintain proper water shedding alignment. Secure the base with roofing nails and seal all nail heads with high-grade polyurethane sealant.
Fixing chimney step flashing involves carefully removing damaged metal pieces, cleaning out old mortar joints using a cold chisel, and inserting new custom-bent aluminum or copper step flashings overlapping each shingle course. Counter-flashing must be secured into cleared mortar joints using expanding concrete anchors and sealed with high-performance silicone or polyurethane masonry caulk to ensure a tight, weatherproof barrier against masonry surfaces.
Preventing Secondary Mold Growth and Structural Decay

Stopping active water entry addresses only half of the problem created by a roof leak; managing moisture inside the building structure is equally critical to prevent long-term environmental and structural hazards. Damp insulation, wet wooden framing, and saturated drywall create ideal breeding conditions for mold spores, which can begin colonizing organic building materials in as little as 24 to 48 hours under warm, dark conditions.
Begin the drying process immediately after stopping the water intrusion. Remove all wet insulation from the attic space, as saturated fiberglass and cellulose lose their thermal resistance and hold moisture against wooden ceiling joists for weeks if left undisturbed. Use heavy-duty air movers, industrial floor fans, and commercial dehumidifiers to circulate dry air throughout affected attic spaces, ceiling cavities, and wall structures.
Monitor moisture levels in wooden framing timbers using a calibrated pin-type moisture meter. Wood moisture content should be brought below 15 percent before installing new insulation, hanging fresh drywall, or closing up wall cavities. Closing up wet framing traps moisture inside, accelerating dry rot—a form of fungal decay that weakens timber strength—and creating hidden mold colonies that can spread behind finished walls undetected.
Choosing an established roofing business means partnering with professionals who understand local weather patterns, regional building codes, and appropriate material specifications. A reputable local contractor will conduct a comprehensive roof assessment rather than offering a quick temporary patch, identifying subtle underlying issues like inadequate attic ventilation or failing underlayment before they cause catastrophic structural damage.
Preventive maintenance remains the single most effective strategy for preventing disruptive leaks. Schedule with local roofing contractors for roof inspections twice a year—ideally in spring and autumn—to identify loose flashings, deteriorating seals, and displaced shingles before severe seasonal weather arrives. Keeping gutters clean, trimming overhanging tree branches away from rooflines, and clearing debris from valleys ensures water drains away smoothly, protecting your building for decades to come.