Your home’s roof is its first line of defense against the elements, but it’s also one of the most overlooked components when it comes to regular upkeep. While many homeowners react only when leaks appear or damage is visible, implementing a structured roof maintenance plan can prevent costly repairs and extend the life of your roof by many years. This comprehensive guide walks you through a step-by-step plan that’s easy to follow and designed to help homeowners safeguard their roofing investment.
Whether you live in a region prone to storms or simply want to protect your home from long-term wear and tear, this plan provides practical and proactive steps. Let’s dive into how you can stay ahead of roof issues before they become expensive problems.
What Is a Roof Maintenance Plan and Why Do You Need One?
A roof maintenance plan is a scheduled approach to inspecting, cleaning, repairing, and preserving your roof to keep it in optimal condition year-round. Think of it as preventive healthcare, but for your home.
Most homeowners only notice roofing issues once water damage, mold, or interior leaks show up. By then, the damage is often extensive and costly. A maintenance plan ensures your roof is regularly checked and small issues are addressed before they become big headaches.
Benefits of a roof maintenance plan include:
- Prolonging roof lifespan by 5–10 years or more
- Reducing the risk of emergency repairs
- Improving energy efficiency by maintaining insulation
- Preserving home value and curb appeal
- Ensuring warranty compliance (some manufacturers require annual inspections)
Investing time in routine roof maintenance pays off significantly over the life of your home.
Step 1: Perform Visual Inspections – Inside and Out
Inspections are the backbone of any effective roof maintenance plan. They help identify potential issues early, before they lead to major damage.
How often should you inspect?
- Twice a year: Ideally in spring and fall
- After major storms, High winds, hail, or heavy snow can cause immediate damage
What to check from the outside:
- Missing, curling, or cracked shingles
- Sagging areas or uneven surfaces
- Damaged flashing around chimneys and vents
- Moss, algae, or dark streaks (which indicate moisture issues)
- Clogged or damaged gutters and downspouts
What to check from the inside:
- Water stains on ceilings or attic boards
- Musty odors or visible mold
- Sunlight visible through attic boards (a sign of holes or cracks)
- Signs of pest intrusion
Tip: Use binoculars for a safe ground-level inspection. Only climb on your roof if you have proper safety training and equipment.
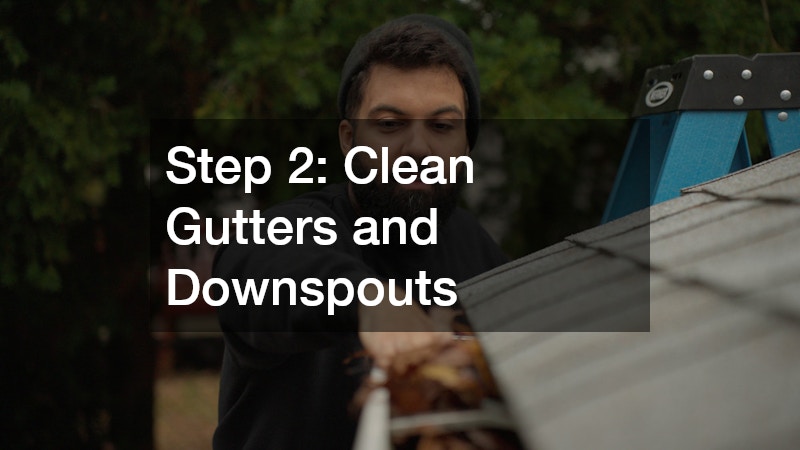
Step 2: Clean Gutters and Downspouts

Clean gutters are critical for proper roof drainage. When debris like leaves and twigs clog your gutter system, water can back up and seep beneath shingles, causing rot and leaks.
How to maintain gutters:
- Clean gutters at least twice a year
- Install gutter guards to minimize debris buildup
- Ensure downspouts direct water at least 3 feet away from your foundation
Warning sign: Water spilling over gutter edges or pooling near the base of your home means your system is blocked.
Step 3: Remove Debris from the Roof Surface
Debris like leaves, branches, pine needles, and even bird nests can trap moisture and promote algae growth. Over time, this degrades your shingles and can lead to serious roofing problems.
Best practices for roof cleaning:
- Use a soft broom or leaf blower; avoid high-pressure washing as it can damage shingles
- Trim overhanging tree branches to prevent leaf accumulation
- Check for signs of pests like squirrels or birds nesting on your roof
Note: If your roof has a steep pitch, hire professionals to handle cleaning safely.
Step 4: Schedule Professional Roof Inspections
Even the most attentive homeowner can miss subtle roofing issues. That’s why it’s important to get a professional inspection as part of your annual maintenance plan.
What professionals look for:
- Granule loss on asphalt shingles
- Improper flashing installation
- Deterioration in underlayment and sealants
- Ventilation issues or moisture buildup
- Structural damage hidden beneath the surface
A professional inspection typically costs between $100 and $300, but it could save you thousands in future repairs.
Pro tip: Ask for a written report with photos. This documentation can be useful for insurance claims or resale value.
Step 5: Repair Minor Issues Immediately
Small problems like a loose shingle or cracked flashing might seem harmless at first, but left unaddressed, they can lead to water intrusion and rot.
Common minor repairs include:
- Replacing lifted or missing shingles
- Resealing flashing around chimneys and skylights
- Fixing nail pops (where nails protrude and compromise shingle sealing)
- Replacing worn-out sealant
DIY or professional? Many small repairs are DIY-friendly with the right tools, but if you’re unsure or dealing with high areas, hire a licensed roofing contractor.
Step 6: Check Attic Ventilation and Insulation
Good ventilation in your attic prevents heat and moisture buildup, both of which can accelerate roof deterioration. Poor airflow also leads to ice dams in colder climates.
What to check:
- Soffit and ridge vents are clear and unobstructed
- No mold or mildew forming on attic beams
- Insulation is evenly distributed and not damp
- Exhaust fans (if present) are functional
If your attic feels excessively hot or humid, call an HVAC or roofing specialist to assess airflow.
Step 7: Winterize Your Roof Before Cold Weather Hits
Freezing temperatures bring unique challenges for roof health, especially in snowy regions. Ice dams, heavy snow loads, and freeze-thaw cycles can cause cracking, warping, and leaks.
Winter roof maintenance tips:
- Clear snow buildup using a roof rake
- Ensure gutters are clean to prevent ice damming
- Inspect the attic for heat loss
- Install heating cables if needed for problem areas
Being proactive before the first freeze can protect your home from significant winter damage.
Step 8: Don’t Forget Skylights, Chimneys, and Vents
While shingles get most of the attention, your roof’s accessories—like skylights, chimneys, and ventilation pipes—also require regular inspection.
What to do:
- Check flashing around chimneys and skylights for cracks or separation
- Ensure vent caps are securely in place and not blocked by debris
- Look for water stains around skylight frames or interior walls
These areas are common weak points where leaks often start. A simple resealing or minor repair can prevent major damage later.
Step 9: Plan Ahead for Roof Replacement
Even the best-maintained roofs don’t last forever. Planning for eventual replacement helps you avoid panic decisions and budget wisely.
How to prepare:
- Know your roof’s age and typical lifespan (e.g., 20–30 years for asphalt shingles)
- Watch for signs like widespread granule loss, sagging, or daylight in the attic
- Get multiple quotes when it’s time to replace
- Explore energy-efficient or impact-resistant materials for long-term value
Being proactive lets you save gradually for replacement and choose the right contractor without pressure.
Step 10: Keep a Roof Maintenance Log
Documenting your roof maintenance plan is essential for staying organized and tracking issues over time. This record is also valuable for warranty claims, insurance purposes, and future home sales.
What to include in your log:
- Date of inspections (DIY or professional)
- Photos of any visible damage or changes
- Repairs completed and by whom
- Receipts and warranties for roofing work
- Contractor contact information
Bonus: Some roofing contractors offer maintenance plan subscriptions that include inspections, documentation, and priority service.
How Much Does a Roof Maintenance Plan Cost?
The cost of a roof maintenance plan depends on your location, roof size, pitch, and the frequency of professional services. However, it’s significantly more affordable than unexpected repairs or replacements.
Average costs:
- DIY Plan: Mostly free aside from tool costs
- Professional Inspection: $100–$300 per visit
- Annual Contractor Maintenance Plan: $200–$800/year
When comparing costs, remember: a neglected roof can cost $5,000–$15,000 or more to replace prematurely. Maintenance is a wise investment.
How to Choose a Roofing Contractor for Your Maintenance Needs

Hiring the right contractor is crucial to ensuring your roof is maintained safely and thoroughly. Avoid fly-by-night companies that disappear after a quick fix.
Look for:
- Licensed and insured professionals
- Local references and online reviews
- Written estimates for all services
- Manufacturer certifications (e.g., GAF Master Elite)
- A clear maintenance plan contract
Ask contractors if they offer annual plans or discounts for bundled services.
How to Create a Seasonal Roof Maintenance Calendar
One of the best ways to stay on top of roof maintenance is by organizing your tasks into a seasonal calendar. Dividing your plan by season helps you avoid overwhelm and ensures that you’re addressing weather-specific concerns when they matter most. A seasonal approach also allows you to plan ahead for professional inspections or needed repairs, rather than scrambling in the middle of an emergency.
Here’s how to break it down:
- Spring: Inspect for winter damage, clean gutters, check flashing, and remove debris
- Summer: Look for UV damage, ensure proper ventilation, and trim overhanging trees
- Fall: Clear gutters again, inspect shingles, and prepare for snow or ice
- Winter: Watch for ice dams, remove heavy snow, and monitor attic ventilation
Creating a simple spreadsheet or using a calendar app with seasonal reminders can help you stay on track. This structured approach helps you form lasting maintenance habits and ensures your roof gets attention year-round, not just when problems arise.
Final Thoughts: Roof Maintenance Is the Homeowner’s Responsibility
Your roof protects your home, belongings, and loved ones. With a well-structured roof maintenance plan, you can catch problems early, keep your home energy-efficient, and avoid the high cost of emergency repairs or full replacements.
Maintaining your roof doesn’t require much—just consistency, awareness, and the willingness to act before issues arise. By following the steps in this guide, you’re making a smart move toward long-term peace of mind and home protection.


